Page 4 - oil

  1. Power Through Deletion. 2015 WRX TGV Delete Kit, Part 2: 3D-Printed Prototype Test Fit

    Power Through Deletion. 2015 WRX TGV Delete Kit, Part 2: 3D-Printed Prototype Test Fit

    3D-Printed Prototypes

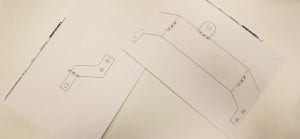
    To confirm the dimensions and design of our prototype, we decided to utilize some of our rapid prototyping tools. We fired up our 3D printer and loaded the model. Check out a couple images showing the progress of the print.

    3D-printing 2015 WRX parts
    3D-printing 2015 WRX parts

    3D-printing 2015 WRX parts
    3D-printing 2015 WRX parts

    Once the printing process was complete, we cleaned up the prototypes and installed them on our 2015 WRX to verify fitment.

    3D-printed 2015 WRX parts
    3D-printed 2015 WRX parts

    3D-printed 2015 WRX TGV delete installed
    3D-printed 2015 WRX TGV delete installed

    You will notice these prototypes include a rear flange to attach to the TGV solenoid. We experimented with a design that retains the flange, in order to bolt the stock solenoids in place for visual inspection purposes. After evaluating this setup, we decided the flange was unnecessary and removed it from the design. Our two functional prototypes will be more similar to our original 3D models.

    Coming up - Functional Prototypes

    With fitment confirmed, we began working up a couple functional prototypes for product

    Continue Reading »
  2. Power Through Deletion. 2015 WRX TGV Delete Kit, Part 1: Design and 3D Prototypes

    Power Through Deletion. 2015 WRX TGV Delete Kit, Part 1: Design and 3D Prototypes

    It's been nearly two years since our first 2015 WRX development vehicle rolled into the shop. We've had a lot of fun with the car, and our team has developed a multitude of awesome components to aid in cooling, elevate power, and improve styling. Our product line is essentially complete, meaning we are done wrenching on our WRX. This is bitter sweet, as we will be picking up another vehicle to start the process once again. Before shipping out the WRX, we had one more project up our sleeves to extract a touch more power.

    With our existing modifications, including our downpipe, intake, and cat-back exhaust system, most customers are making in the neighborhood of 290 whp and 310 wtq. Not bad for some simple bolt-on modifications and ECU tuning. We've been eyeing TGV modifications and have seen the impressive effects on Subarus from previous model years. We decided to open up the intake system on our 2015 to see if we could design a delete system that would deliver a few extra ponies.

    Stock

    Continue Reading »
  3. Working on a cooler Coyote - Oil Cooler R&D, Part 1: Initial Prototype

    Working on a cooler Coyote - Oil Cooler R&D, Part 1: Initial Prototype

    Here at Mishimoto headquarters we are working to expand our arsenal of Mustang parts. We are making significant progress on our oil cooler design, and an interesting design it is. We are aware that many Mustang GT owners are adding forced induction to their already powerful V8s. We are taking this into account by offering an oil cooler that would still leave room for some of the larger intercoolers required for aftermarket turbo and supercharger kits. This strategy created quite a challenge for our engineers. As always, they rose to the occasion and created a brand new and unique cooler design specifically for our beloved GT. Drumroll please!

    Rather than designing a traditional bracket for this all-new oil cooler, our engineers went with an interesting design. Modeling the bracket after one of the plastic upper air diverters, the new bracket will replace the diverter as the bracket for the cooler. Because a picture really is worth a thousand words, check out some photos of the first oil

    Continue Reading »
  4. Keep Oil Out of Your Intake - Oil Catch Can R&D, Part 2: The Driver-Side

    Keep Oil Out of Your Intake - Oil Catch Can R&D, Part 2: The Driver-Side

    Last time we took a look at the passenger-side catch can setup for our brand-new Mustang GT. We will still be making more improvements to our original design going forward, but the main location will stay the same. Now onto our driver-side catch can development!

    Driver-side Mustang catch can bracket installed
    Driver-side Mustang catch can bracket installed

    Driver-side Mustang catch can installed
    Driver-side Mustang catch can installed

    The driver-side catch can was a bit more difficult to place than the passenger-side catch can. We wanted to position the catch can such that it would fit with the rather intricate stock intake, while still leaving room for aftermarket intakes. Our engineers utilized the radiator stay, similar to the passenger-side, to tuck the catch can off to the side and out of the way, thus saving room for some additional Mustang parts.

    Driver-side Mustang catch can bracket installed
    Driver-side Mustang catch can bracket installed

    Routing of driver-side Mustang catch can hoses
    Routing of driver-side Mustang catch can hoses

    Although we do not expect to see much accumulation in the driver-side catch can, we will still test it for comparison purposes.

    Continue Reading »
  5. Mazda Miata NB Oil Cooler R&D, Part 4: On-Road Testing

    Mazda Miata NB Oil Cooler R&D, Part 4: On-Road Testing

    Interested in picking up our NB Miata oil cooler kit? Check out our discounted pre-sale linked below.

    Mishimoto 1999-2005 Mazda Miata Oil Cooler Kit Pre-Sale!

    Our idle warmup provided a nice baseline test to evaluate the benefit of the stock liquid-to-liquid oil cooler. From what we saw in the conditions of our first test, warmup is not greatly affected by this component. In this second portion of product testing, we will be evaluating the impact of this heat exchanger on cooling performance. More importantly, we will be evaluating the cooling benefits of our liquid-to-air cooler.

    Testing Plans

    Variations

    • Stock liquid-to-liquid heat exchanger
    • Mishimoto oil cooler setup
    • Mishimoto oil cooler setup plus stock liquid-to-liquid heat exchanger

    By testing the Mishimoto oil cooler both with and without the stock heat exchanger, we can determine if this piece is helping reduce temperatures, or if the coolant temperatures are causing a rise in oil temperatures. This conclusion will allow our team

    Continue Reading »
  6. GTO Oil Cooler R&D, Part 3: Line Route and Thermostat Inclusion

    GTO Oil Cooler R&D, Part 3: Line Route and Thermostat Inclusion

    Any efficient oil cooler setup needs proper regulation if the vehicle is going to see street use. As many know, cold oil can be just as harmful as oil that is overheated. Allowing engine oil to come up to temperature prior to romping on the throttle is a wise move that will extend the life of your GTO LS. Ideally, you would want the oil at operating temperature as soon as the key is turned. This is typically not possible on a first start, but the quicker it arrives at operating temperature the better. This is why we are including a thermostatic option for this kit, and we highly recommend its use in any street car with this kit installed.

    Line Route

    We found the best route for our oil lines would be to run them across to the driver side of the front bumper area, winding around the radiator support, and eventually mating with our adapter on the oil filter housing. This route provides an ideal line angle coming into the adapter, as well as a good location for our thermostat.

    Mishimoto GTO oil cooler line route
    Mishimoto GTO
    Continue Reading »
  7. Keep oil out of your intake - Oil Catch Can R&D, Part 1: Blow-By Introduction

    Keep oil out of your intake - Oil Catch Can R&D, Part 1: Blow-By Introduction

    The 2016 Mustang GT has arrived at Mishimoto, and we are wasting no time in developing products for Ford's newest version of the Pony car. We decided to begin with a version of our baffled oil catch can specifically designed to be direct-fit with the Mustang GT.

    Stock Mustang Parts
    Stock Mustang Parts

    You would be doing your Coyote a favor by installing some type of catch can for preventative maintenance. Some feel that a catch can is not a necessity until you introduce forced induction, which may be the case. On the other hand every ounce of blow-by collected in a catch can is an ounce that is not heading back into your intake to kill fuel mileage, buildup on valves, and increase the risk of detonation. To read more about the benefits of a catch can in depth, check out our complete write up on Blow-By 101.

    Mishimoto's Baffled Oil Catch Can was designed to trap virtually all blow-by from sneaking its way back into your intake. Our can is equipped with internal air diverters to direct airflow, a large baffle

    Continue Reading »
  8. Focus on Cooling! Mishimoto's Ford Focus ST Radiator R&D, Part 2: A Look at Our First Prototype

    Focus on Cooling! Mishimoto's Ford Focus ST Radiator R&D, Part 2: A Look at Our First Prototype

    Quick Recap

    It has been around two months since our last update on this project. We've had great feedback on the forums, and we appreciate everyone's comments and patience as we work toward completion. Our goal is to provide a performance radiator that allows users to track drive their STs without fear of overheating and entering limp mode.

    The primary reason for the delay was the construction of our first prototype. This radiator design is quite complex, as we showed with our 3D models in the first segment.

    Mishimoto Ford Focus ST radiator 3D model
    Mishimoto Ford Focus ST radiator 3D model

    The stock Focus radiator features several complicated components, each of which needed to be replicated in our design. Our goal is that this piece bolts into position just like the stock radiator, so the design must be precise.

    The rear side of the radiator shows the quick-disconnect fittings on both the inlet and outlet. These will be CNC-machined. In addition, we incorporated seven mounting points, one nipple, and two lower mounting pegs.

    Continue Reading »
  9. GTO Oil Cooler R&D, Part 2: Oil Cooler Bracket Fabrication

    GTO Oil Cooler R&D, Part 2: Oil Cooler Bracket Fabrication

    In our last post, we selected an ideal location to mount our cooler, so now we need to develop and fabricate a set of brackets to rigidly mount our large 25-row heat exchanger. For this task, we have a full fabrication shop and many bright minds at our disposal.

    GTO Oil Cooler Mounting Bracket Fabrication

    We opted to utilize the upper grille ducts shown in our last post, which should provide ample airflow to the heat exchanger. With more airflow hitting the core, we should see impressive heat transfer.

    We began this project by capturing measurements and dimensions from the points where we want to mount within the front grille area. Once complete, we drew up some rough plans for the bracket shape and modeled them in Solidworks. These models were then flattened and printed out in template form.

    Pontiac GTO parts templates
    Pontiac GTO parts templates

    Using our shear, bandsaw, and brake, our initial prototype brackets were quickly completed for test fitting.

    Prototype bracket
    Prototype bracket

    For optimal rigidity, we typically support

    Continue Reading »
  10. Keeping The Party Cool! Mishimoto's Ford Fiesta ST Radiator R&D, Part 5: Initial Testing Results

    Keeping The Party Cool! Mishimoto's Ford Fiesta ST Radiator R&D, Part 5: Initial Testing Results

    Interested in picking up our Fiesta ST aluminum radiator? Check out our the product page below.

    Mishimoto 2014+ Ford Fiesta ST Aluminum Radiator

    After quite an extensive developmental process, we're finally ready for some Ford Fiesta ST (FIST) radiator testing. This portion of our R&D process is crucial, as it will determine if our design is perfect or requires minor tweaks, or if the slate needs to be wiped clean for a fresh start. This particular radiator is unlike most that we develop. FIST owners are getting in trouble on the track, and no good solution to rising coolant temperatures has yet been found. We've attributed this to inefficiencies in both airflow and the inadequate stock FIST radiator. In order to fit a larger, more efficient radiator, we've had to modify the stock fan shroud. In doing so, we've created the space needed for the thicker radiator core, and we've managed to retain the stock fan. Check out the prototype.

    Mishimoto Ford Fiesta radiator shroud assembly
    Mishimoto Ford Fiesta radiator shroud assembly

    Let's

    Continue Reading »