BMW E46 3-Series Aluminum Expansion Tank, Part 4: Prototype Installation
Another update on our E46 expansion tank project! Last time we showed off some images of our prototype unit, noting the numerous precise features we built into our design. This time we are installing the tank in our test vehicle to confirm fitment with the stock shroud and all coolant connection points. In addition, we will check out clearance between the tank and the belt-drive system to ensure appropriate fitment.
Removing the Stock BMW E46 Expansion Tank

Stock BMW E46 expansion tank installed
First we need to remove the stock tank from our test vehicle. As you can see in the image above, the stock fan shroud is the first component to come out before we tackle the expansion tank, hose connections, and mounting plate.

Stock BMW E46 expansion tank installed
After Dan managed to spill coolant all over the garage floor (thanks, Dan!), the stock tank and mounting plate were removed from the E46.

Stock E46 expansion tank removed from vehicle
Separating the tank from the mounting plate can be a challenge, especially if these pieces have been married for a long time. Once the clips are removed, we used a screwdriver, pick, or small pry bar to slowly pull up the tank away from the connections. Keep in mind that the plate is plastic and likely fragile from age, so you may need to take it easy and give it a little wiggle during removal to unstick the components.
Once apart, the level sensor can be twisted out for removal. We are left with the components below.

Stock E46 expansion tank removed from mounting plate
Mishimoto BMW E46 Expansion Tank Install
With the plastic tank removed and thrown in the garbage bin, we could now install our aluminum counterpart. Our previous install was on a new OEM mounting plate. Installing it on the well-used unit on our test vehicle would be more representative of the install performed by our customers.
We installed the level sensor and slid our tank onto the plate.

Installing Mishimoto BMW performance parts
A little bit of force and an audible click notified us that the tank is seated. Tight, secure, and precise is all I can say about the fitment of this piece!

Installing Mishimoto BMW performance parts
Back in the car it goes!

Installing Mishimoto BMW performance parts

Installing Mishimoto BMW performance parts
All coolant line fittings mated up perfectly and clicked into position. Assuming the O-rings within the stock hoses do not have any flat spots, these should be leak free.

Installing Mishimoto BMW performance parts
A look from above!

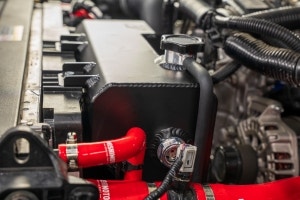
Installing Mishimoto aluminum BMW E46 expansion tank
Once this piece was in place, we fit the fan shroud into position!

Mishimoto aluminum E46 expansion tank installed
Our fitment report is in! All components slid into place properly and operated leak free. Clearances were nearly identical to those of the stock expansion tank. After a few hundred miles, the sensor is functioning perfectly, and the tank is performing exactly as designed.
Additionally, we will be collecting data on external tank temperatures and any impact on the components near the tank. So far, we are seeing expansion tank temperatures equal to that of the radiator end tank, which is expected because of the aluminum construction. Our initial results showed no appreciable increases in temperatures recorded on nearby intake components. More on this testing coming soon.
Coming Up!
Now that we have a final design that fits perfectly and operates exactly like the stock expansion tank, it is time to start manufacturing our first batch of tanks! Soon we will be launching a discounted pre-sale for those interested in picking up this product.
Keep an eye out for more updates on upcoming Mishimoto BMW performance parts.
Thanks for reading!
-John


