A COLD HEART FOR THE CAMARO - OIL COOLER R&D - PART 2: Prototype & Testing
The pre-sale for this oil cooler kit is now live! You can purchase the 2010-15 Camaro SS Oil Cooler Kit here!
There's nothing quite like the feeling of powering down the long straight, your right foot trying to turn the throttle into dust, hurtling towards the first turn. As the engine RPM climbs into the red you tell yourself not to lift, keep that foot down until the last second. You've put your heart and soul into your Camaro's engine, and you've placed your trust in your Mishimoto oil cooler. All you need to do now is keep your foot down and let them both do their jobs.
Combating high oil temperature is something that almost every 5th Gen Camaro SS owner has experienced. The factory liquid-to-liquid oil cooler that we examined in the last post is just not up to the task of cooling the engine's oil during high-stress driving, or even idling in traffic on a hot day. For the past couple of months, our project engineer, Jason, has been working on a direct-fit oil cooler that will let the Camaro run cooler, even if your palms get a little sweaty behind the wheel.

With the bumper off, Jason could find a clean spot to mount our oil cooler core. Jason also wanted to let the Camaro know that it rocks.
Let the Work Begin
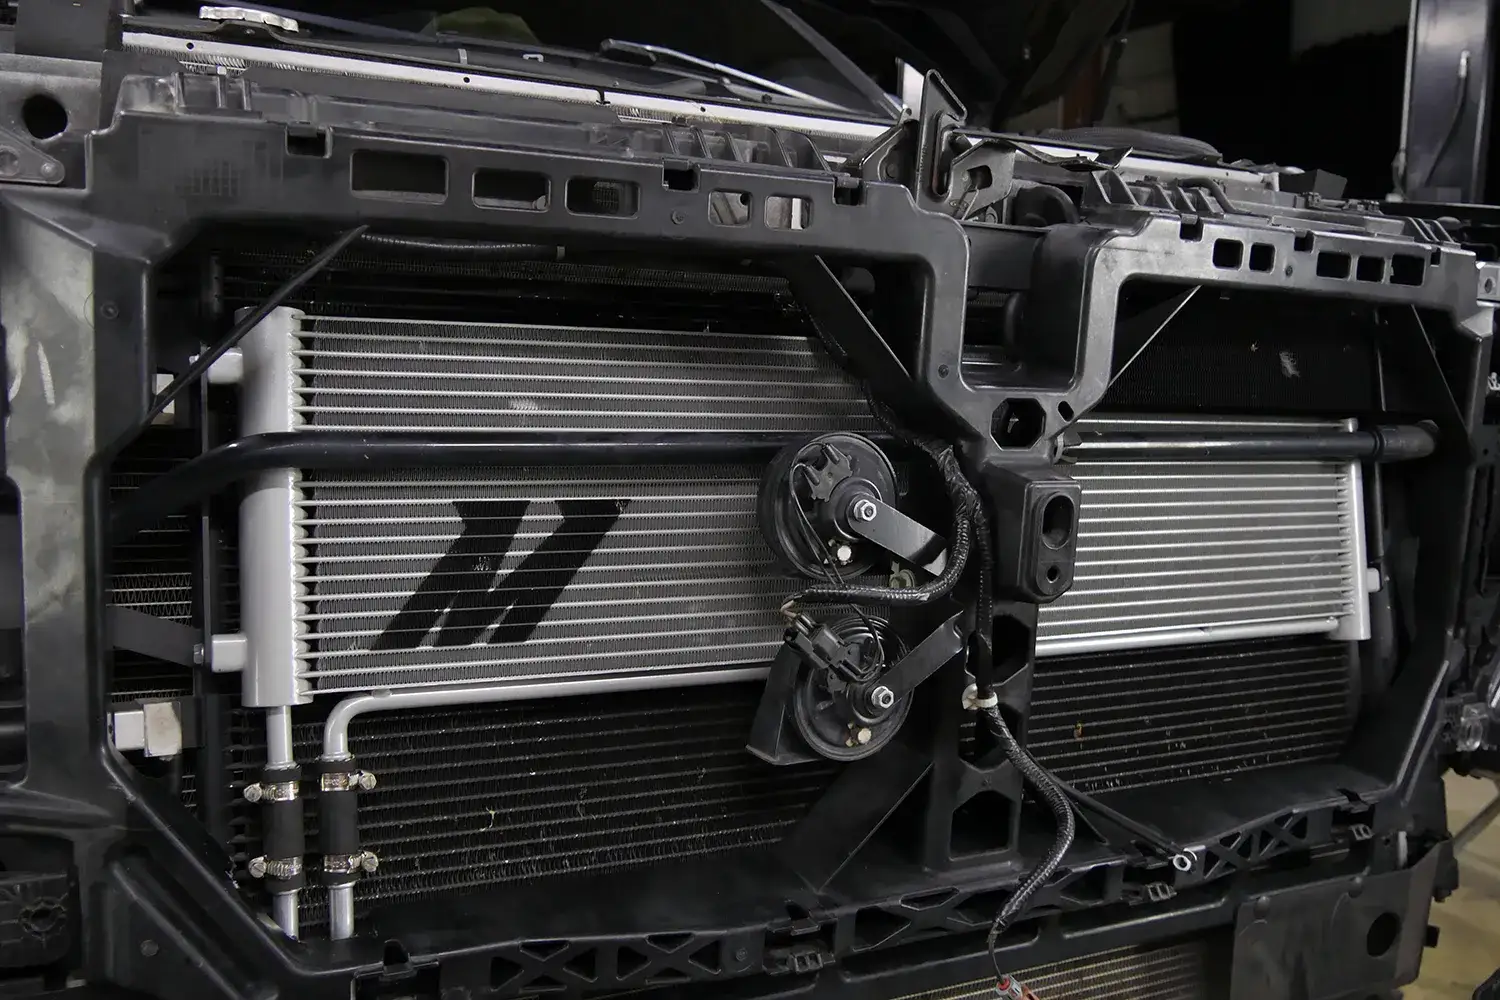
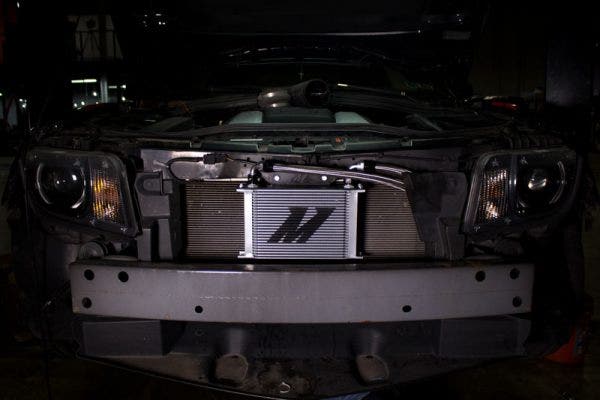
Deciding where to begin starts with pulling the front bumper off the Camaro. Once the large bumper was peeled off, we found a cavernous amount of space to work with. While the core that we planned on using was only 11" by about 7", we wanted to be sure that it was positioned to allow the use of a front-mount intercooler for turbo and supercharged vehicles, as well as keeping it in the flow of air through the bumper. The most important goal remained, which was finding a way to mount an oil cooler that doesn't require drilling or modifying the body of the vehicle. With all of this in mind, our options quickly became limited.

Chevy was kind enough to provide us with two threaded holes in the radiator support for mounting our core.
Most front-mount intercoolers mount low, utilizing airflow through the large opening at the bottom of the bumper and take up a lot of space laterally. That left only the space above the crash bar (the large rectangular beam in the photo above). Luckily, the 5th Gen Camaro's aggressive, open grill provides ample air-flow through the upper half of the front end as well, so we had some space left to work with. All that was left was to find a place to mount a bracket without drilling or cutting. As if Chevy knew we were going to need a place to mount an oil cooler, the upper radiator support provides two perfect, already tapped holes, right in the center of the grill where the air flows through. With the proper measurements taken, Jason was ready to start working up the model for the oil cooler core bracket.

Simple is often better and this bracket is definitely simple.
One of the greatest advantages to making our own oil cooler cores is that we can design them with easy mounting options in mind, allowing us to transfer one core from one vehicle to another simply by creating a bracket. This interchangeability also lets us design the simplest possible bracket for each application. One major consideration when mounting an oil cooler is to make sure that the inlet and outlet fittings have ample room above and beside them. For this bracket and core, the fittings extend from the top, meaning space above the core was paramount. Jason was able to design a simple L-bracket that dropped the oil cooler down just far enough to clear some 90° AN fittings. A Mishimoto M-logo adds a subtle badass touch to a relatively simple piece. Once the bracket design was finalized, Jason sent the model off to our fabricator to be cut out on the waterjet, bent, and painted.

This Camaro was chosen for a reason that stands out in this photo: its long-tube headers.
Connecting Point A to Point B
With the mounting of the oil cooler core sorted, the next step in cooling the Camaro was getting the core filled with oil. There are a few ways to tap into the oil source of an engine and returning the cooled oil. The most common methods are tapping into existing oil galley plugs on the motor, using one of those galley plugs for the cooler's oil source and tapping the oil pan for the return, or using a sandwich plate between the oil filter and engine. Each method has its advantages and disadvantages. Galley plugs are often hard to get to, require special fittings or thread adapters, and unless you know the layout of the oil galleys within the motor, you can't be sure how much of the engine is actually getting the cooled oil. However, this method is pretty simple and leaves few possibilities of failure. Using a galley plug for the source of the oil and dumping the cooled oil back into the pan is more effective in ensuring most of the motor sees the cooled oil, but it requires draining the oil pan, removing it, drilling and tapping a hole or welding on a bung, cleaning the pan and then reinstalling it. When there's no other option available, this method works well and it's reliable, but we prefer the third option: the sandwich plate.

Sandwich plates are a simple and effective way to tap into an engine's oil source.
Sandwich plates do exactly what their name suggests; they sandwich between the oil filter and its mount to tap into the engine oil as it enters the filter. Sandwich plates are a simple, bolt on solution to tapping into the engine oil without a lot of extra parts or fabrication. There are a few important considerations to make when using a sandwich plate, however. First, it's important to use a quality plate with quality seals to prevent leaking between the plate and the filter mount and between the plate and the filter. Our plates are made with the same high-quality materials as all our components and include a square O-ring between the plate and filter mount, so you have the most possible sealing surface area.
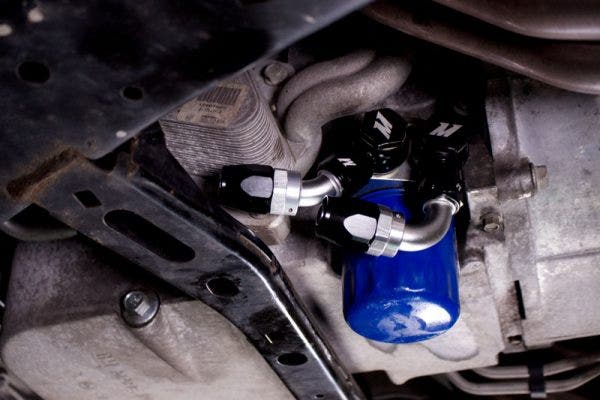
Banjo bolts keep out sandwich plate setups clean and compact.
It's a Little Tight in Here
The other major consideration with a sandwich plate is ground clearance. For vehicles with a low-mounted oil filter, a sandwich plate will push the filter closer to the ground. For some vehicles, this may push the oil filter lower than the protective sub-frame of the car, making it susceptible to road debris and scraping over large bumps. One must consider clearance for any under-paneling on the vehicle as well. This is an especially important point for daily-driven vehicles that see road surfaces that are a less predictable than tracks. We obviously want our oil cooler kit to be functional on both daily-drivers and track cars, so we paid close attention to ground clearance as we installed our sandwich plate on the Camaro SS. Luckily, with a thickness of only about 1.25 inches, both the thermostatic and the non-thermostatic sandwich plates kept the oil filter above the sub-frame. With major structural components of the sub-frame both in front of and beside the oil filter, we're confident it will stay safe.

Even with the added thickness of the sandwich plate, the oil filter is still safely tucked above the sub-frame.
The final piece of the puzzle was to connect the sandwich plate and the oil cooler. For most of our oil cooler kits, we utilize sturdy and durable stainless steel braided lines and AN fittings. We did the same with this kit, but the Camaro SS presents some unique challenges in terms of clearance for lines and fittings. We chose this particular SS for one popular reason: it was equipped with long-tube headers. While long tubes sound amazing, and produce a ton of power, they also take up a ton of room. With the main collector of the driver-side header passing within inches of the oil filter location, our choice of fittings for the sandwich plate needed to be as compact as possible. Instead of using 90° AN fittings for the sandwich plate, we used banjo fittings that could sit flush to the plate and direct our lines towards the front of the car. Jason ran the lines through a safe route over the sub-frame and into the front bumper area to connect to the core.
Performance >= Beauty
Two days of measuring, designing, measuring some more, testing and fitting led to a successful installation of our prototype oil cooler kit. Jason was happy with how it turned out considering all the challenges he faced with limited clearance and a laundry list of requirements. But it's not enough for our products to look the part, they have to function even better than they look. With a few modifications to the lines to accommodate temperature and pressure sensors, Jason buttoned up the Camaro and hit the road for some performance testing. We were lucky enough to have an unseasonably warm day in the Delaware winter to test the cooler. Of course, I had to ride along to man the laptop; it was a pretty rough day in the office. With an open highway in front of us, Jason leaned his right foot into the throttle, bringing the LS3 to a screaming pace and pushing us into our seats under its 400 ft-lbs of torque. After a few repetitions and the usual I-95 traffic, the cooler showed no signs of suffering from heat-soak so we headed back to the shop for Jason to crunch the data.
 Our oil cooler was able to drop oil temps by about 35 degrees Fahrenheit
The stock liquid-to-liquid oil cooler on the Camaro kept the oil at around 200°F under similar conditions. Keeping in mind that we were not driving anywhere near as hard as one would on the track, this test goes to show just how ineffective the stock oil cooler is. With the addition of the Mishimoto oil cooler, Jason was able to lower the oil temp by almost 40°F with an average oil temperature hovering around 160°F at the oil cooler outlet. This 25-row core should prove more than efficient enough to bring those 230°F+ oil temps at the track down to something a little less heart attack inducing.
Hope you've enjoyed reading and feel free to let me know if you have any questions!
Thanks,
-Steve
